Unlock Restaurant-Quality Crispy Onion Rings at Home
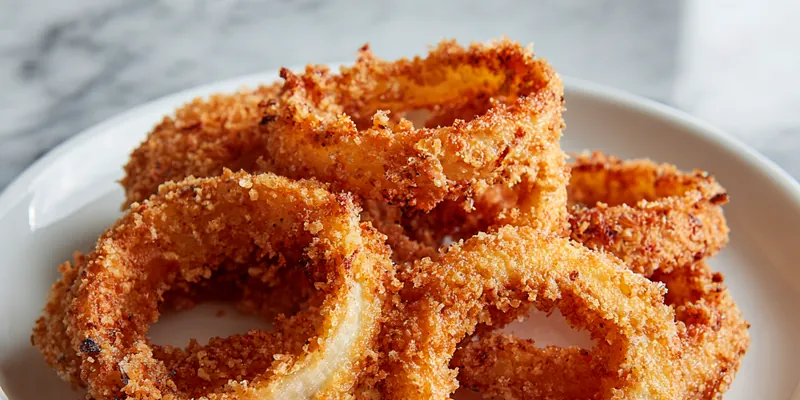
There's something undeniably satisfying about a plate of hot, fresh, and perfectly crunchy onion rings. That delicate balance of sweet, tender onion encased in a salty, incredibly crispy coating is a culinary delight often reserved for your favorite restaurant visits. But what if we told you that achieving those golden, restaurant-quality crispy onion rings in the comfort of your own kitchen is not just possible, but surprisingly easy? Forget soggy, store-bought imposters – we're diving deep into the ultimate onion rings recipe that promises to rival, if not surpass, anything you've ever ordered out.
Many home cooks shy away from deep-frying, intimidated by the process. However, with a few expert tips and the right approach, you can transform humble onions into an irresistible appetizer or side dish. We’ve gathered insights from culinary pros, including a restaurant insider who shared the secrets to their crave-worthy rings, ensuring that every bite delivers that harmonious combination of flavors and textures you adore. Get ready to impress your family and friends with homemade onion rings that are truly better than any you'll find.
Why Homemade Onion Rings Are a Game Changer
Opting for homemade onion rings over pre-made or restaurant versions offers a multitude of benefits. Firstly, you have complete control over the freshness and quality of your ingredients, ensuring a superior taste. Secondly, there’s an immense satisfaction in creating something so delicious from scratch. You can customize the seasoning to your exact preference, perhaps adding a touch more garlic powder or a pinch of paprika for extra flair. Moreover, making them at home means you can enjoy them piping hot, straight from the fryer, ensuring maximum crispness – a critical factor that often diminishes rapidly after cooking. It’s an experience that truly elevates a simple side dish into a culinary event.
The Anatomy of a Perfect Onion Ring: Key Ingredients Explained
Crafting the ultimate crispy onion ring starts with understanding the role each ingredient plays. This isn't just a list; it's a guide to flavor and texture perfection.
- The Star: Sweet Onions
While any onion can be used, sweet onions (like Vidalia or Walla Walla) are the undisputed champions for onion rings. Their milder flavor profile means you get that delightful onion sweetness without an overpowering, tangy bite from sulfur compounds. This ensures a balanced flavor that pairs perfectly with the salty coating. If sweet onions aren't available, yellow onions can work, but consider a longer soak to mellow their pungency. - The Batter's Foundation: Milk, Vinegar, and Egg
Our wet batter component is crucial. A combination of milk and vinegar creates a quick "buttermilk" effect, even if you're not using actual buttermilk. This acidity not only helps to tenderize the onion slightly but also mellows its flavor further. Buttermilk, if you have it, is an excellent choice for an even more tender and flavorful result. The egg acts as a vital binder, helping the dry flour mixture adhere firmly to the onion slices, ensuring a robust and crispy crust. For those with dairy sensitivities, a milk alternative works beautifully here. - The Crispy Coating: Flour and Spices
All-purpose flour forms the backbone of your crispy coating. For gluten-free needs, a good quality gluten-free all-purpose blend can be substituted. But flour alone won't deliver that restaurant-worthy flavor. This is where your simple spices come in: salt (generously!), garlic powder, and black pepper. Don't underestimate the power of seasoning your coating well; it's where much of the savory magic happens. You can experiment with a touch of onion powder, paprika, or even a pinch of cayenne for a subtle kick. - Oil for Frying: The Golden Rule
The type of oil you use makes a significant difference. You need a good neutral oil with a high smoke point to prevent burning and impart off-flavors. Excellent choices include avocado oil (a healthier option), safflower oil, grapeseed oil, or even refined coconut oil. For a more traditional, rich flavor, lard or tallow can also be used. The key is to have enough oil (at least an inch or two deep) and maintain a consistent temperature.
Mastering the Method: Step-by-Step for Crispy Perfection
Following a precise method is key to achieving that coveted crispy exterior and tender interior. This isn't just about dipping and frying; it's a sequence designed for success.
- Onion Preparation: The Foundation
Begin by slicing your sweet onions. Remove the top and bottom, peel off the papery skin, then slice the onion thinly, aiming for about ¼-inch thick rings. Carefully separate these into individual rings. Uniform slices ensure even cooking. - The Wet Batter: Creamy & Flavorful
In a medium bowl, combine your milk and vinegar. Give it a quick stir and let it sit for about 5 minutes – this allows the "buttermilk" to activate. Then, whisk in the egg until well combined. This mixture provides the moisture needed for the dry coating to adhere. - The Dry Coating: Seasoned to Perfection
In a shallow dish, whisk together your all-purpose flour, salt, garlic powder, and pepper. Make sure these spices are thoroughly integrated into the flour so every onion ring gets a burst of flavor. - The Double-Dredge Technique: Layering for Crispness
This step is critical for building that robust, crispy crust. First, lightly dredge your onion slices in the dry flour mixture. This initial coating acts as a primer, creating a rough surface for the wet batter to cling to. Shake off any excess. Next, dip these flour-coated onions into your milk mixture, allowing any excess liquid to drip off. Finally, return them to the dry flour mixture for a second, thorough coating. Press gently to ensure the flour adheres well. Place the double-coated rings onto a plate or baking sheet. Repeat until all onions are coated. - The Secret Setting Step: Don't Skip This!
Here's a game-changing tip directly from restaurant kitchens: Once your onion rings are fully coated, transfer the plate or tray to the freezer for 15-20 minutes. This crucial step allows the coating to set and firm up, dramatically reducing the chance of it falling off during frying. It's truly The Secret to Crispy Onion Rings: Don't Skip This Freezer Step! - Frying Fundamentals: Heat & Timing
While the rings are chilling, add about 1-2 inches of your chosen oil to a deep skillet or Dutch oven. Heat the oil over medium heat to 350°F (175°C). A deep-fry thermometer is invaluable here for accuracy. Once the oil is at temperature, carefully remove the onion rings from the freezer. - Batch Frying for Golden Perfection
Fry the onion rings in batches. Overcrowding the pan will drop the oil temperature and lead to greasy, soggy rings. Fry for 1-2 minutes per side, or until they turn a beautiful golden brown and are incredibly crispy. Remove them with a slotted spoon or spider and immediately transfer them to a paper towel-lined plate or a wire rack set over paper towels to drain excess oil.
Tips and Tricks for Onion Ring Excellence
Elevate your homemade onion rings from great to truly extraordinary with these additional insights and expert recommendations:
- The Buttermilk Soak Advantage: For an even more tender and mellow onion, consider soaking your separated onion rings in buttermilk (or the milk-vinegar mixture) for 30 minutes to an hour in the refrigerator before starting the dredging process. Pat them dry thoroughly before coating. This firms up the onion slices and further tames their flavor.
- Seasoning Beyond the Batter: For an extra layer of flavor, lightly sprinkle your separated onion rings with a pinch of salt and pepper before the first flour dredge. This ensures the onion itself is seasoned, not just the coating.
- Oil Temperature is King: Consistency is key. If your oil is too cool, the rings will absorb too much oil and become greasy. If it's too hot, the coating will burn before the onion cooks through. Invest in a good thermometer and adjust your heat as needed between batches.
- Dipping Sauce Dynamics: While these crispy onion rings are fantastic on their own, a complementary dipping sauce takes them to the next level. Classic homemade ketchup, a zesty aioli, a creamy ranch, or even a spicy sriracha mayo are all fantastic companions.
- Freezing for Future Feasts: You can freeze raw, coated onion rings before frying. Arrange them in a single layer on a baking sheet and freeze until solid, then transfer to a freezer-safe bag for up to 3 months. Fry directly from frozen, adding a minute or two to the cooking time. For pre-fried rings, allow them to cool completely, then freeze on a tray and transfer to a bag. Reheat in a hot oven or air fryer for best results.
- Achieving Restaurant Crispiness: The double-dredge and the freezer step are paramount, but don't overlook the importance of letting excess batter drip off and ensuring your oil is at the correct temperature. For more insights on achieving that perfect crunch, check out our guide on Easy Homemade Onion Rings: Achieve Restaurant Crispiness.
Serving Suggestions
These homemade crispy onion rings are incredibly versatile. Serve them as a standalone appetizer with a variety of dipping sauces for a game day snack, or pair them with classic American fare like juicy burgers, hot dogs, or a perfectly grilled steak. They also make an excellent substitute for fries, adding a touch of gourmet flair to any meal.
Mastering the art of the perfect crispy onion ring at home is a culinary achievement that brings immense satisfaction. By following this comprehensive onion rings recipe, utilizing the double-dredge technique, embracing the crucial freezer step, and maintaining optimal oil temperature, you'll consistently produce onion rings that boast a tender interior and an irresistibly crunchy, golden-brown exterior. Say goodbye to mediocre store-bought versions and hello to a new standard of homemade deliciousness. Give this recipe a try, and prepare to be hailed as the master of homemade, restaurant-quality crispy onion rings!
